Claim A Gift
Usage guide

Create, share, and reserve gifts without the guesswork

Choose the path that matches what you are doing. Every step below uses the real Claim A Gift interface.

Creator guide

Create and share your list

Login is optional. You can create a list as a guest, but you must keep the Creator URL if you want to edit it later.

Create a free list
  1. 1

    Create the occasion

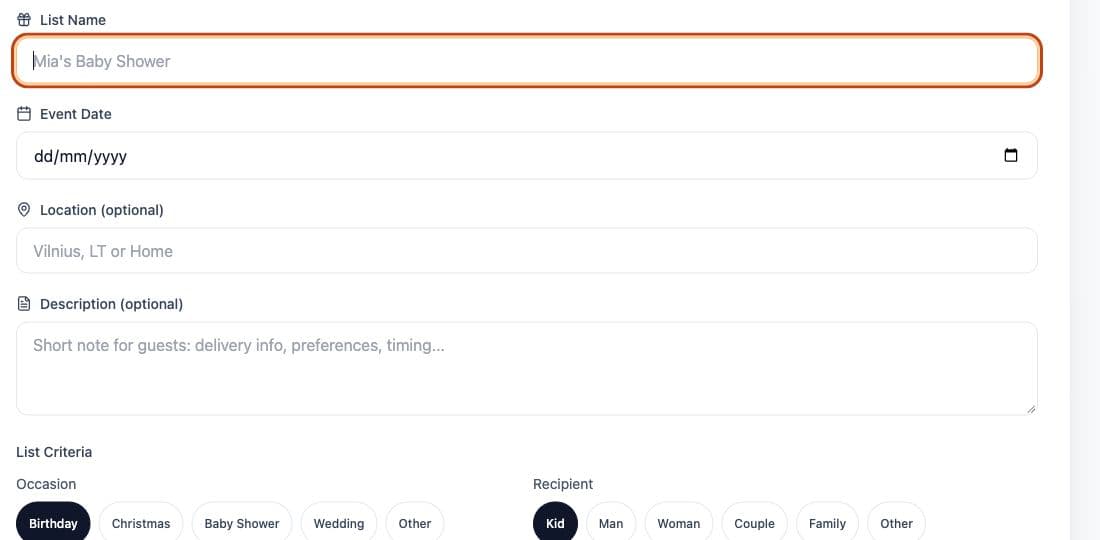
    Enter a list name, event date, and any useful details. Choose the occasion, recipient, and age group, then select Create Occasion.

  2. 2

    Add gift ideas

    Paste a product link, add a custom gift, create a group gift, or import several links at once. Changes are saved automatically.

  3. 3

    Add helpful details

    Include size, color, preferred store, quantity, or a short note so guests know exactly what to choose.

  4. 4

    Share the Guest URL

    Select Copy Public URL and send that link to family and friends. It opens the read-only guest view.

  5. 5

    Keep the Creator URL private

    Save your Creator URL. Anyone who has it can edit the list, add gifts, and see reservation names.

Guest URL and Creator URL are different

Send the Guest URL to invitees. Keep the Creator URL private because it allows full list editing. If another person should help manage the list, create a separate creator link for them.

Claim A Gift creator form with list name, event details, and list criteria
Start with the occasion details. Login is not required.
Claim A Gift creator workspace showing gift entry options and a live guest preview
Add gifts on the left and check the live guest preview on the right.

Guest guide

Choose and reserve a gift

Guests do not need an account. The shared list shows what is still available before anyone buys a duplicate.

  1. 1

    Open the shared link

    Use the Guest URL sent by the list creator. You do not need to create an account or sign in.

  2. 2

    Choose an available gift

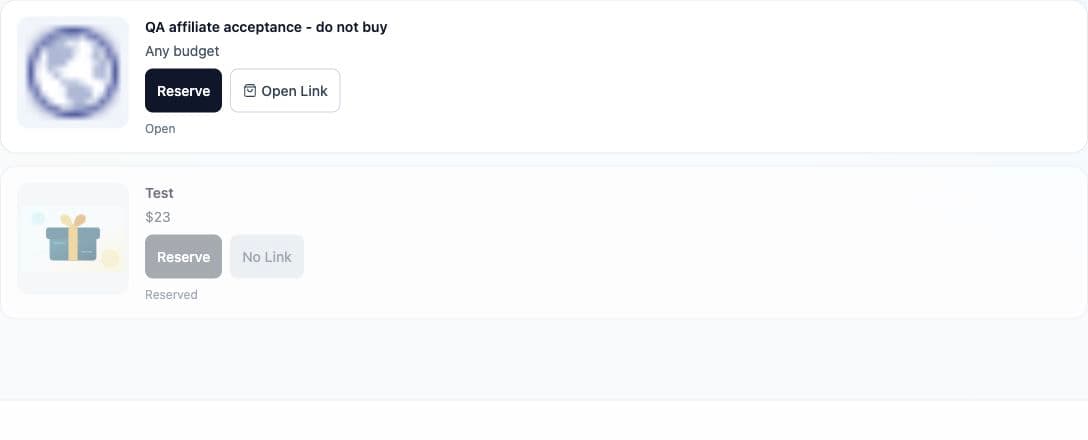
    Review the list and select Reserve on the gift you plan to buy. Availability updates help guests avoid duplicates.

  3. 3

    Confirm your reservation

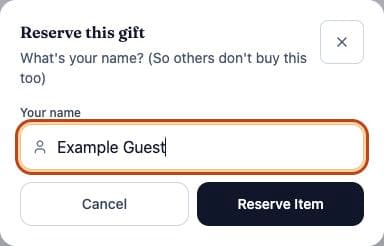
    Enter your name, choose a quantity when available, and select Reserve Item. Other guests will see that the gift is reserved.

  4. 4

    Complete the purchase separately

    If a shop link is included, open it and buy from the seller. Claim A Gift records the reservation but does not process the shop payment.

Public Claim A Gift list showing available gifts and Reserve buttons
Open the shared list, review availability, and select Reserve.
Claim A Gift reservation dialog asking for the guest name and quantity
Enter your name and confirm. No guest account is needed.

No guest sign-up

Invitees can reserve directly from the shared list.

Live availability

Each reservation updates what later guests can choose.

Separate checkout

Purchases and payments happen outside Claim A Gift.

Ready to begin?

Create your first shared gift list

Set it up in a few minutes and share one clear link with guests.

Create a list